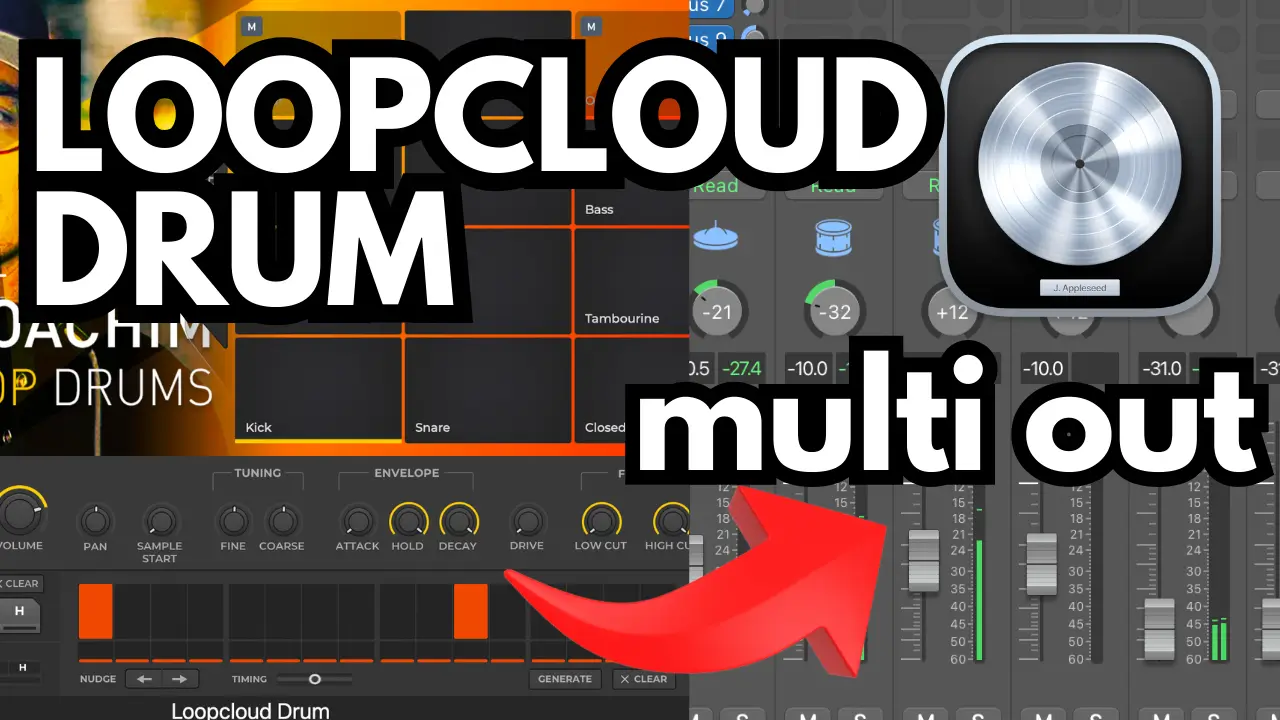
If you’re using Loopcloud Drum in Logic Pro and want to take your beat-making to the next level, setting up multiple outputs is a game-changer! Separating your drum sounds into individual mixer channels gives you full control over mixing, processing, and applying effects to each sound separately. In this guide, I’ll show you exactly how to route Loopcloud Drum to multiple outputs in Logic Pro, so you can improve your workflow and achieve a professional mix.
Related Posts:
- How to Set Up Multi-Output for MODO Drums in Logic Pro
- How to Create Multiple Outputs for Kontakt 8 in Logic Pro
- How to Set Up Triaz Drum Machine Multi-Output in Logic Pro
Why Use Multiple Outputs in Loopcloud Drum?
By default, Loopcloud Drum sends all its sounds through a single stereo output. But if you want to:
✅ Apply separate effects to each drum sound
✅ Balance each element in your mix individually
✅ Process kicks, snares, hi-hats, and other elements differently
✅ Achieve a cleaner, more polished drum mix
… then setting up multi-output routing is essential!
Step-by-Step Guide to Setting Up Multiple Outputs in Logic Pro
Step 1: Load Loopcloud Drum as a Multi-Output Plugin
- Open Logic Pro and create a new Software Instrument Track.
- Click on the Instrument Slot in the Channel Strip and select Loopcloud Drum.
- Instead of loading it as a Stereo plugin, choose Multi-Output (8x Stereo or 16x Mono).
Step 2: Open the Mixer and Enable Extra Outputs
- Press X to open the Mixer in Logic Pro.
- Find the Loopcloud Drum Channel and click on the “+” button at the bottom of the track.
- This will create additional auxiliary channels, allowing you to route individual drum pads to separate mixer tracks.
Step 3: Assign Drum Pads to Individual Outputs
- Open Loopcloud Drum and navigate to the Mixer Tab inside the plugin.
- Each drum pad has an output assignment option. Click on it and set:
- Kick → Output 3-4
- Snare → Output 5-6
- Hi-Hats → Output 7-8
- Percussion → Output 9-10
- Continue assigning sounds as needed for your mix.
Step 4: Mix and Apply Effects in Logic Pro
- Now, each drum sound has its own channel in Logic’s Mixer.
- Apply EQ, compression, reverb, and other effects to each drum separately.
- Balance the levels to create a cleaner, more dynamic drum mix.
Pro Tips for Better Drum Mixing in Logic Pro
🎛 Use Bus Sends for Glue Effects – Instead of applying reverb or compression to individual sounds, send them to a Bus Channel for a more cohesive sound.
🎧 Layer Your Drums for More Depth – Duplicate certain elements and adjust panning to create a wider, fuller drum mix.
⚡ Save Your Multi-Output Setup as a Template – Avoid repeating these steps every time by saving a Logic Pro Template for fast access in future projects.
Final Thoughts
Setting up multiple outputs for Loopcloud Drum in Logic Pro is a powerful technique that gives you complete control over your drum sounds. Whether you’re producing hip-hop, EDM, or any other genre, this workflow will help you achieve a more professional, polished mix.
🚀 Want more music production tips? Subscribe to my YouTube Channel for in-depth tutorials!
This is my affiliate link for LoopCloud. If you purchase through these links, I may earn a commission at no additional cost to you. I appreciate any assistance you can offer. Also, I’m only endorsing products and services I use or think will benefit my subscribers.
Let me know in the comments – How do you mix your drums in Logic Pro?
Keywords: LogicPro, LoopcloudDrum, MusicProduction, DrumMixing, LogicProTips, BeatMaking.
Related Posts:
- How to Set Up Multi-Output for Synthesizer V by Dreamtonics in Logic Pro
- How to Set Up Multiple Outputs in Logic Pro with Steven Slate Drums 5 (SSD5)
Over 4 Million Sounds
Turn samples into songs with a versatile plugin suite. Loopcloud DRUM and Loopcloud PLAY craft pro‑quality beats and melodies that sound like you, and no one else.